UFO is My Favorite Touhou Game, Here’s Why
the typical touhou fan would say that ufo is a bad game cuz of the gimmick and it was made better in wbawc. while that opinion itself is ok, i believe that the first iteration of the gimmick in ufo was already great and wbawc's version isnt that all satisfying to do. however, another thing is how the game is too hard. personally, i get that stance too since some of the patterns can get incredibly difficult by the series standards.
with these two common complaints in mind, its possible to see that some fans prefer games that focus almost exclusively on the "dodging and shooting" and grants them tons of leniency, like the early windows titles touhou 6 to 8 (although i really like 7).
to be honest though, im not here to justify my opinion by shitting on other games since each game will appeal to different people. instead, imma explain why i love ufo, despite some people saying otherwise, by going on what i think it makes it good.
THE GIMMICK
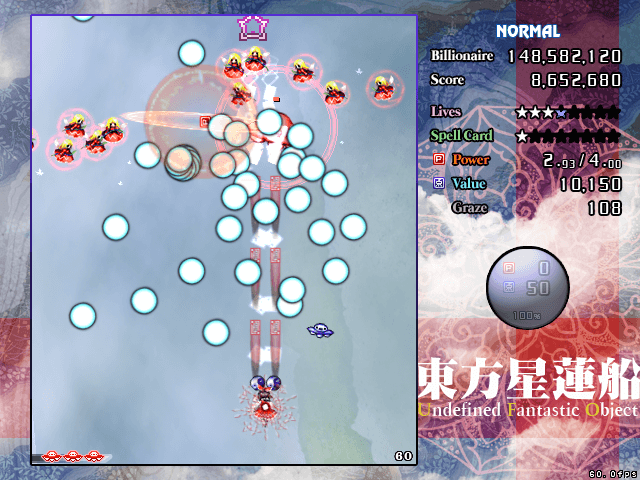
its the little ufos that come out of the enemies when you shoot down specific ones. a few things to keep in mind is that not only the exact enemy who drops the ufo is in the same spawning position and timing, the exact token they drop (the little ufo i was talking about) will also be the same color and type. the colors can be blue, green, and red. they can also stick to the same color for the entire time they're on screen or cycle through in that exact order i listed with red going to blue.
once you get three of a kind or one of each, you'll summon a big ufo. what the big ufo does depends on what color you had. if its blue, then expect a big score award. if its green, you're going to get bombs. if its red, you're gonna get some life pieces to get extends. you'll also notice the items being sucked into the ufo. you'll want to summon these when there's enemies on screen or right before they get on screen to shot them down and fill the ufo to get its satiation bonus. for blues, its the score multiplier, greens grants you a WHOLE BOMB to use, reds grant you an additional life piece, and rainbows give you an extra token to chain summons back-to-back.
a quick section for rainbows: what determines the color of the token it drops is based on the last token collected to summon it. also it inverts power and score items, so you'll want to summon a rainbow with enemies that drop score to recover from power loss (it's bad in this game, i won't deny that!) or drop power to do a score cash out where blues cant do much from.
however, i will mention that summoning these can be tighter than expected, as the tokens don't stay on screen long for long and decently easy to mess up your summon by collecting the wrong token. also the big ufo only stays on screen for a couple seconds and it moves along your horizontal position when the timer hits 7 seconds. and you can die from touching it.
the good news is that you can collect tokens while a summon is on screen to prevent later summons from being messed up or to increase point item value if you're scoring.
and of course, you destroy the big ufo by shooting it down or bombing it.
overall, this makes stage routing more in-depth, demanding you to know your stages well and plan your summons beforehand to get awarded with loads of resources and is the primary method to cash out with your score milking from grazing.
THE SHOTS
overall, the shots are pretty fun to use and mostly balanced.
there's really two shots that i think that start messing with the balance. those being sanae-b and marisa-b, with the former shredding through stages and some boss patterns due to her exploding frog options covering a lot of space along with her bomb being able to be used in almost anyway you want, and the latter being far more suited for scoring than survival, with its damage and bomb design showing it. the rest of them are generally good without being too weak for what they're built for.
my favorite shot-type in the game is reimu-a, the needles. i prefer this one since the boss performance is great and has better damage control than marisa-a and sanae-b. also makes destroying ufos easy without using a bomb if you did your summons well. her bomb is similar to marisa-a, except it also covers the bottom. she also has a movement speed penalty like marisa but it doesn't seem as nearly as bad as her. my other one is marisa-a, which gives up reimu-a's damage and small hitbox for piercing and speed. really fun to use if you prefer summoning aggressively. her bomb is good ol' master spark, but she has abysmal movement speed, making it good for mostly speedkilling bosses.
the remaining two are reimu-b and sanae-a, the homing shots. reimu-b is the standard reimu homing that's present in the touhou games. in here, it can help with stage performance obviously due to said homing but also summoning and destroying UFOs with her bomb since her speed isn't restricted unlike reimu-a. meanwhile, sanae-a's homing works differently: the snakes don't home in until they're at the same horizontal position for target, in which they turn and immediately head towards it. also her bomb, to me, is like a longer version of marisa-b's bomb, making it better for speedkilling patterns and as a more effective screen clear.
in short, while its obvious there's gonna be some shots that are better than others, i think they're worth using once you know what they're built for. as i said before, i like reimu-a cuz of the good boss performance thanks to her damage and bombs. i like doing the work for stage routing so i dont really like sanae-a or the homing shots.
THE STAGES
the stages in ufos are also pretty fun once you get a route down for them. of course not all of them are largely great but as a whole, still good.
while at the end of each stage, there's a boss but ill save those for their own section. midbosses (a boss at around halfway through the stage) will be discussed here.
STAGE 1
stage 1 is where the game test the waters on you. in here you're given easy reds but you can also go for 4 extra bombs if you really want to do that (i'm currently doing that for my marisa-b N1CC!). if you're just simply playing for the first time, focus on this summon route:
- red
- rainbow
- red
- red
if you're struggling on getting this route down, don't fret. you can skip a summon or change it out to be something else. however, experiment with changing the route to find something you're comfy with your runs. midboss nazrin simply primes you for the absurd amounts of micrododging you will have to do in this game. to get through her patterns, assuming you're playing on easy or normal, line up for the kunais and let them go through, and then avoid the arrowhead walls and shoot her down (this is closer to macrododging though).
STAGE 2
now things heat up here. if you collected any tokens in stage 1, they'll be kept here including out of stage 2 and into later stages.
at this point of the game, your summon options become more flexible, as reds and greens and rainbows become more viable to setup here. summoning blues become relevant here but i would only worry about blues in a survival run if summoning any other color is too slow.
i usually go for greens if im good on lives, reds if my lives are lower than i want them to be. rainbows are there if i mess up on my summon routing or do recovery (rainbows are really good for this! remember to summon a rainbow with lots of blue drops to get your power back! power loss sucks here!). midboss kogasa is ironically not that scary but can trip you up if you slack too much on it, despite its simplicity.
STAGE 3
stage 3 is probably the most boring stage in this game. i was legit procrastinating when i was writing this.
in general, its gonna be similar to stage 2 but with different enemy formations. what's viable to summon here is roughly the same list from stage 2: red, greens, and rainbows. and blues if you're scoring in your run.
for my runs, i generally go for more greens than reds but i may swap it if my lives are low.
midboss icihrin is also easy but i think her spell pattern is pretty fun once you get the idea down, which is staying in the middle for the first wave and then misdirecting the fists so you can go back to shooting down icihirin while unzan misses his punch.
STAGE 4
NOW things get crazy. you have far more summoning opportunities compared to earlygame but they're much more risker to do.
chain summoning (summoning multiple big UFOs back-to-back) is recommended here, and it's also fun to do too! i would summon reds here if im still not on max lives or greens to jack up my bomb stock, but depending on the shot-type i'm playing, i may end up getting less bombs. also using rainbows here to recover doesn't seem the best idea cuz a lot of enemies drop power items, although ive not paid much attention to the item drops in this stage, so you're free to prove me wrong for using rainbows on stage 4 for survival.
also nue shows up! but she's a ball. the midboss here is called nueball. her award from her varies depends on if you died or bombed. if you do either, you get a bomb. if you do neither, then you get an extra life! i highly recommend learning her patterns to consistently get the extend.
also, leave the stage with some red tokens, you'll need those shortly.
STAGE 5
this is where the stage difficulty peaks at.
remember what i said two sentences ago? the opener fairies drop red tokens, you can get an easy red here! also, if your summoning is going well due to your risky movements being paid off, you can chain summon into another red.
anyway, one highlight of this stage is the windmill walls that come at you. you need to misdirect them and immediately move out of the way once they start moving. i keep going around the screen to keep up with the spawns but you can alter this if you feel this isn't working for you after trying what i said a couple times.
the real highlight is midboss nazrin. fortunately, in runs with no restrictions, all you do is speedkill her! just bomb twice, one for nonspell, one for the spell. this may not work if you're playing marisa-b due to her low damage bomb.
another one after this is the bonus fairies if you speedkill and the fairy spam afterwards, the former allowing you to summon more and the latter being a huge scoring cash out and a recovery section.
STAGE 6
obviously the small walk to the final boss, but this is basically where you decide between doing your final score cash outs, stacking up on bombs, or recover from power loss.
also holy shit, space invaders! i say this when i didn't play space invaders. anyway its the formation where you do your final bits of scoring, recovery, or your final extra bombs from the stages until you're forced to fight byakuren.
i really like the presentation of this stage but im saving the details for later too.
THE BOSSES
nue will not be mentioned here since ive not beaten her yet as of this writing
NAZRIN
nazrin isn't all that crazy for a stage 1 boss.
her nons are pretty easy and her first spell can be routed. final is also easy but it can lead into bubble spam if your shot can't do enough damage before it happens.
i would expect dying to her patterns if you grossly underestimate her but still, not that hard for a stage 1 boss.
KOGASA
kogasa is ironically not that scary once you get good at them, but they can still surprise you with a miss.
any of her spells can do that but her final may seem more harder than it should but there is a strategy against it. go to the corner where the cyan amulets are going up instead of down and switch corners when kogasa right before kogasa fires a red arrowhead blast.
still not scary but be sure to practice her spells
ICHIRIN
ichirin can get hard like her final and spell 1 but spell 2 is unusually easy.
spell 1 is random, which makes it a good spot to spend a bomb on but you can cap if you got good reading skills. final is laser reading and then misdirecting unzan's fists. however, the lasers can be hard to read and positioning yourself to misdirect is also pretty hard. its another spell i recommend practicing on.
also nonspell 2 seems hard for a stage 3 nonspell pattern. this is despite me achieving multiple 1CCs in this game on both easy and normal and eventually going to hard and lunatic.
MURASA
murasa has a fun spell 1 which involves misdirection but her timeout final must be routed.
her nons are just non 1 but with more subpatterns as the fight goes on.
also, my most failed patterns are spell 2 and final, with the former being me not knowing how to do it on normal and the latter with me not practicing the route to capture it consistently.
SHOU
shou's patterns is where my nerves spike the most since i want my runs to go to byakuren but admittedly, she has some fun patterns, which are spell 1 and spell 3.
spell 1 can be routed to where you chase down shou and it makes reading easy, since shou always starts at the middle, then left, then middle, then right. spell 3 looks hard but its really gonna be the jellybeans that will get you. you can route it to make it consistent to cap but ive not practiced this.
spell 2 is supposed to be the easy pattern, but i keep fearing the laser walls and the arrowhead walls will clip so i pop a bomb.
also a cool thing you can do on non 3: you can spin the pattern by going between shou and the lasers she spawns and then going around her carefully. this is useful to know and practice higher difficulties, especially if you plan on becoming a serious touhou player (im gonna have to practice this soon).
BYAKUREN
i think byakuren has all the fun stuff but its all in a single spell but her final keeps scaring me because of the emotional release of getting a 1CC is insane to me (in a good way).
please bomb spell 1, the overlap sucks ass.
non 2 looks wack but it can be done in the middle, close to the bottom, if you're on easy/normal or with a specific route in hard/lunatic
spell 2 is a simple static and aimed spell that can be routed. its easy but a little boring.
non 3 still looks really difficult to me so i save a bomb here to use. ive also not practiced it that much so thats something i should look into it.
spell 3 can be done with no horizontal movement but i recommend practicing your own route to see what you're comfortable with. i still keep thinking the lasers won't clip me and they clip me.
non 4 is the crazy ass non; she starts moving around. bomb here if you don't want to deal with that.
spell 4 or devil's recitation is where i think zun locked in for spell design. the general strategy here is use your vertical space to avoid the bullets that are coming at all angles, especially with the final subpattern. also, get ready to quickly go out and in of focus when you're about to get cornered as a way to escape death.
spell 5, i dont have a strong opinion on, it just feels there. easy mode takes it out and the fight feels better without it but i think its me not practicing capturing this spell.
final shouldn't be that hard but my nerves always spike up here during my runs since im really close to finishing the run. i remember this spell a little bit for another doc i was writing up for and i clearly dont have my nerves checked for this spell.
ALL THE OTHER STUFF
MUSIC
the music in here, while not many i would put in my playlist (i dont let my playlist decide the song i listen, i have it set to loop the current song), there's a good few of them that i genuinely like
sealed cloud route is my favorite track in this game. it actually feels like you're soaring in the skies. also makes me want to get a cold drink sometimes, but its just cold water i want really. and blue skies are really just comfy to look at, especially if the sky is bright.
this is gonna be corny, but emotional skyscraper sounds like a xenoblade unique monster theme.
but for real, i do believe zun spent too much energy on composing this song but i also think it was worth it. he managed to pull off the epic orchestral feeling well, with the drop being an amazing way to release all that emotion.
a runner-up is heian alien. i like how chaotic and anxiety-inducing it is due to its dissonant notes.
also hi divine bloodlines from castlevania (did zun ever play castlevania?)
another runner-up is fires of hokkai. zun wanted to make a track that used a heartbeat and honestly, it goes hard. perfectly suits the tension of being about to fight byakuren, as you're slowly preparing for it.
VISUALS
its really fucking bright but some of the character art is pretty good by zun standards at the time.
to start, reimu looks like she has her ideal design to me. marisa is still fucking around with outfits but that's her shtick in the games. sanae, i would argue its one of her better designs cuz of her hair. however, if she had her debut outfit, then i would say its her ideal design.
also, the boss designs arent all that bad save for a few.
nazrins appearance in this game is what i prefer over the later installments due to the more washed out colors on her dress.
kogasa looks good already in here, but future works made her better.
ichirins fit actually looks like ass, thank AoCF for giving her a much better fit. unzan looks funny here but of course AoCF makes him more menacing.
murasa looks fine here, but 17.5 gave her the design that doesn't need any fixing.
shou's design actually sticks out here and makes her look imposing but too bad she barely shows up outside of UFO.
byakuren has my favorite design, i adore the cape. her design in AoCF with the straw hat instead of the cape makes her look more friendlier but i like the cape more. but i won't scold for liking the straw hat more. nue is pretty unique but i wish future designs captured the wackass hair more.
WRITING
clearly not peak fiction but theres some things that i like:
- kogasa and byakuren, i like
- the plot being the heroine being a jackass when they're not trying to is a funny
i dont have full knowledge of UFO's writing and i don't play shmups for the writing but touhou's the exception to this but im unsure if ill care enough to develop my opinion on this
CLOSING NOTES
admittedly, this was made to just finalize the website before i go back to college after my spring break. ill try to make an updated version of this later as its own page once i start making more progress on my goal for this game. also, some of my opinions may not develop more, such as my writing and visual opinions. however, do expect my gameplay opinions to develop rapidly after this writing.